Determine missing rows |
  
|
Determine missing rows |
|
This tutorial explains how missing (or different) rows of two Excel spreadsheets can be recognized.
When you are working with large sheets, your differences can be "all over the place". With the navigator you can "jump" from one difference to the next but you want overview, and concentrate on (for instance) the rows that were added or deleted.
Synkronizer allows you to only display specific differences(e.g. missing rows) and blend out the remaining parts, so your differences appear together on your screen.
This page will show you how to efficiently use the "Show/Hide" tool.
| 1. | Download the example files from the webpage: http://www.synkronizer.com/files/examplefiles.zip |
| 2. | Extract the zip file and copy the Excel files to a folder of your preference. |
| 3. | Open Excel and start Synkronizer. |
| 4. | Select the files Master.xls and Update.xls.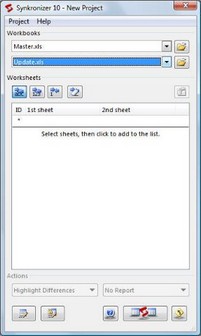 |
| 5. | In the section "Worksheets" select the worksheets "Customers 2009-10-31" and "Customers 2009-11-30". Now click then on the checkbox (see cursor).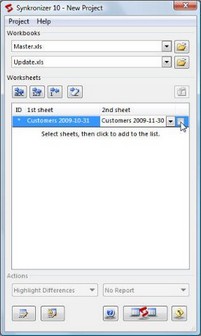 The worksheets are added to the worksheet list. |
| 6. | In order to activate the database modus you need to double click on the worksheets or click on the database symbol (see cursor).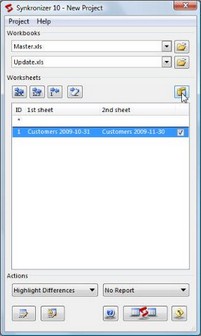 The options frame is now open. |
| 7. | Click now "Enable DB mode" and select the primary key "Customer No." in the list box "Fieldnames". Add the primary key with a check (see cursor). For more information about the behaviour of databases and primary keys, please read chapter "General information about databases". 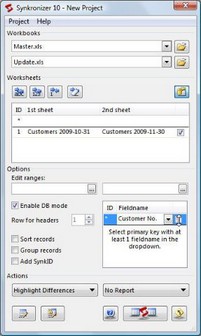 |
| 8. | Click on "Group records" (this ensures that all missing rows are grouped together).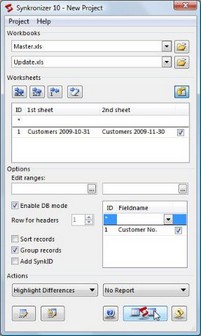 Start the comparison (see cursor above.) |
| 9. | The Navigator is now displayed. As you can see, Synkronizer found 5 different rows in the Master file and 7 different rows in the Update file (see cursor, caption 5/7).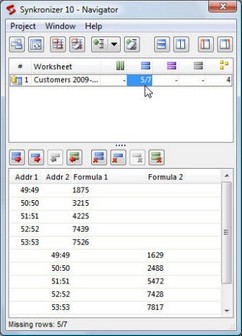 |
| 10. | If you like, you can now update the worksheets (transfer differences from left to right or vice versa). For this, just select the desired differences and click on the update buttons (see cursor below).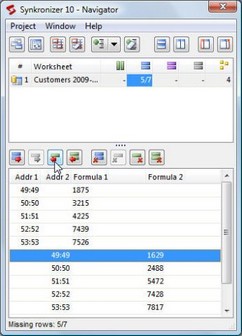 |
| 11. | If you prefer to show the missing rows only, click with the cursor on the arrow of the "Show/Hide"-symbol and select all columns and "Missing rows". Click then on the "Show/Hide"-button (see cursor below). The rows will be hidden and/or displayed now. |
| 12. | You can see the missing rows only (and all columns). |
| 13. | When you close the Navigator form you will be asked if the Synkronizer highlighting should be removed or not. Press "No". Note: the default response to this dialog can be set in Settings.. 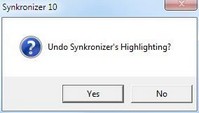 |