Network Installation |
  
|
Network Installation |
|
Application
Only in case you have purchased a network license (registration key) the files needed by the application can be installed to a shared network drive, although it is not mandatory. The network license file must be installed on a shared network drive.
The network license
The network license file is a single file located on a shared folder which contains the registration key for the edition(s) you purchased. That license file will be activated once (and locked to the server/path). The client PC’s can then be allocated or removed based on their network name, without further need for activation.
Initial Installation
| 1. | Create a shared network drive. |
| 2. | Install the software using the method "Network Installation".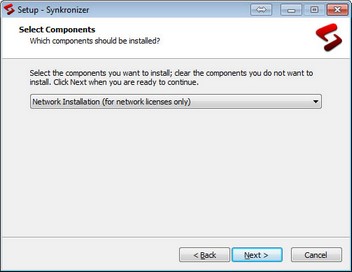 |
| 3. | Then select the network folder in which the license should be copied. Note: Synkronizer requires a UNC path.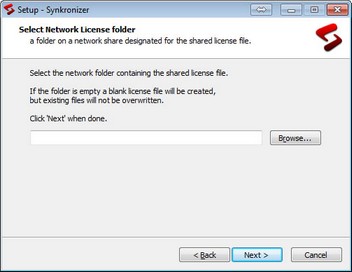 |
| 4. | Complete the installation. |
| 5. | Start Excel and Synkronizer. |
| 6. | Register and activate the software |
| 7. | Add the workstations which are allowed use Synkronizer (see below) |
Installations on workstations
The installation on the workstations is very easy. Perform a network installation and select the network directory, which contains the license file. If the software is activated and the workstation is assigned, the user can work with Synkronizer immediately.
Schema Network
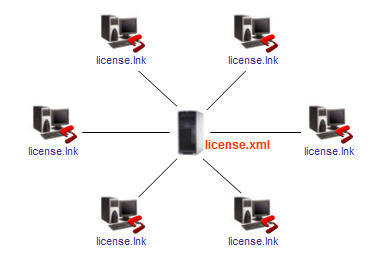
The license file (license.xml, red) is located on a shared folder.
The installation folder of the Synkronizer users contain a shortcut (license.lnk, blue) to the license file.
Permissions
At least one user must have write/modify permission on the license file, while all others only need read permissions. The user(s) with write permission can register/activate the license and manage the list of allowed computers.